
I know, I vanished again. I have been busy…I just keep forgetting to share! I’m at least two teapots behind (yep, I’ve painted four now this year – shh! Don’t tell my husband, LOL!)
But I’ve also been busy crafting lots of different things. Since my hubby finally made me a beautiful cabinet for two of my dollhouses (yep, need to share about those too), it’s inspired me to get back to finishing the houses I started renovating…and never quite finished. My pirate tavern has been calling especially loudly. So, I’ve been working on making some barrels and crates to help fill out the scene (they’re going to have a place on the front dock, aka project 79838261) and there will be another mini scene below the tavern (project 78838262) 😉
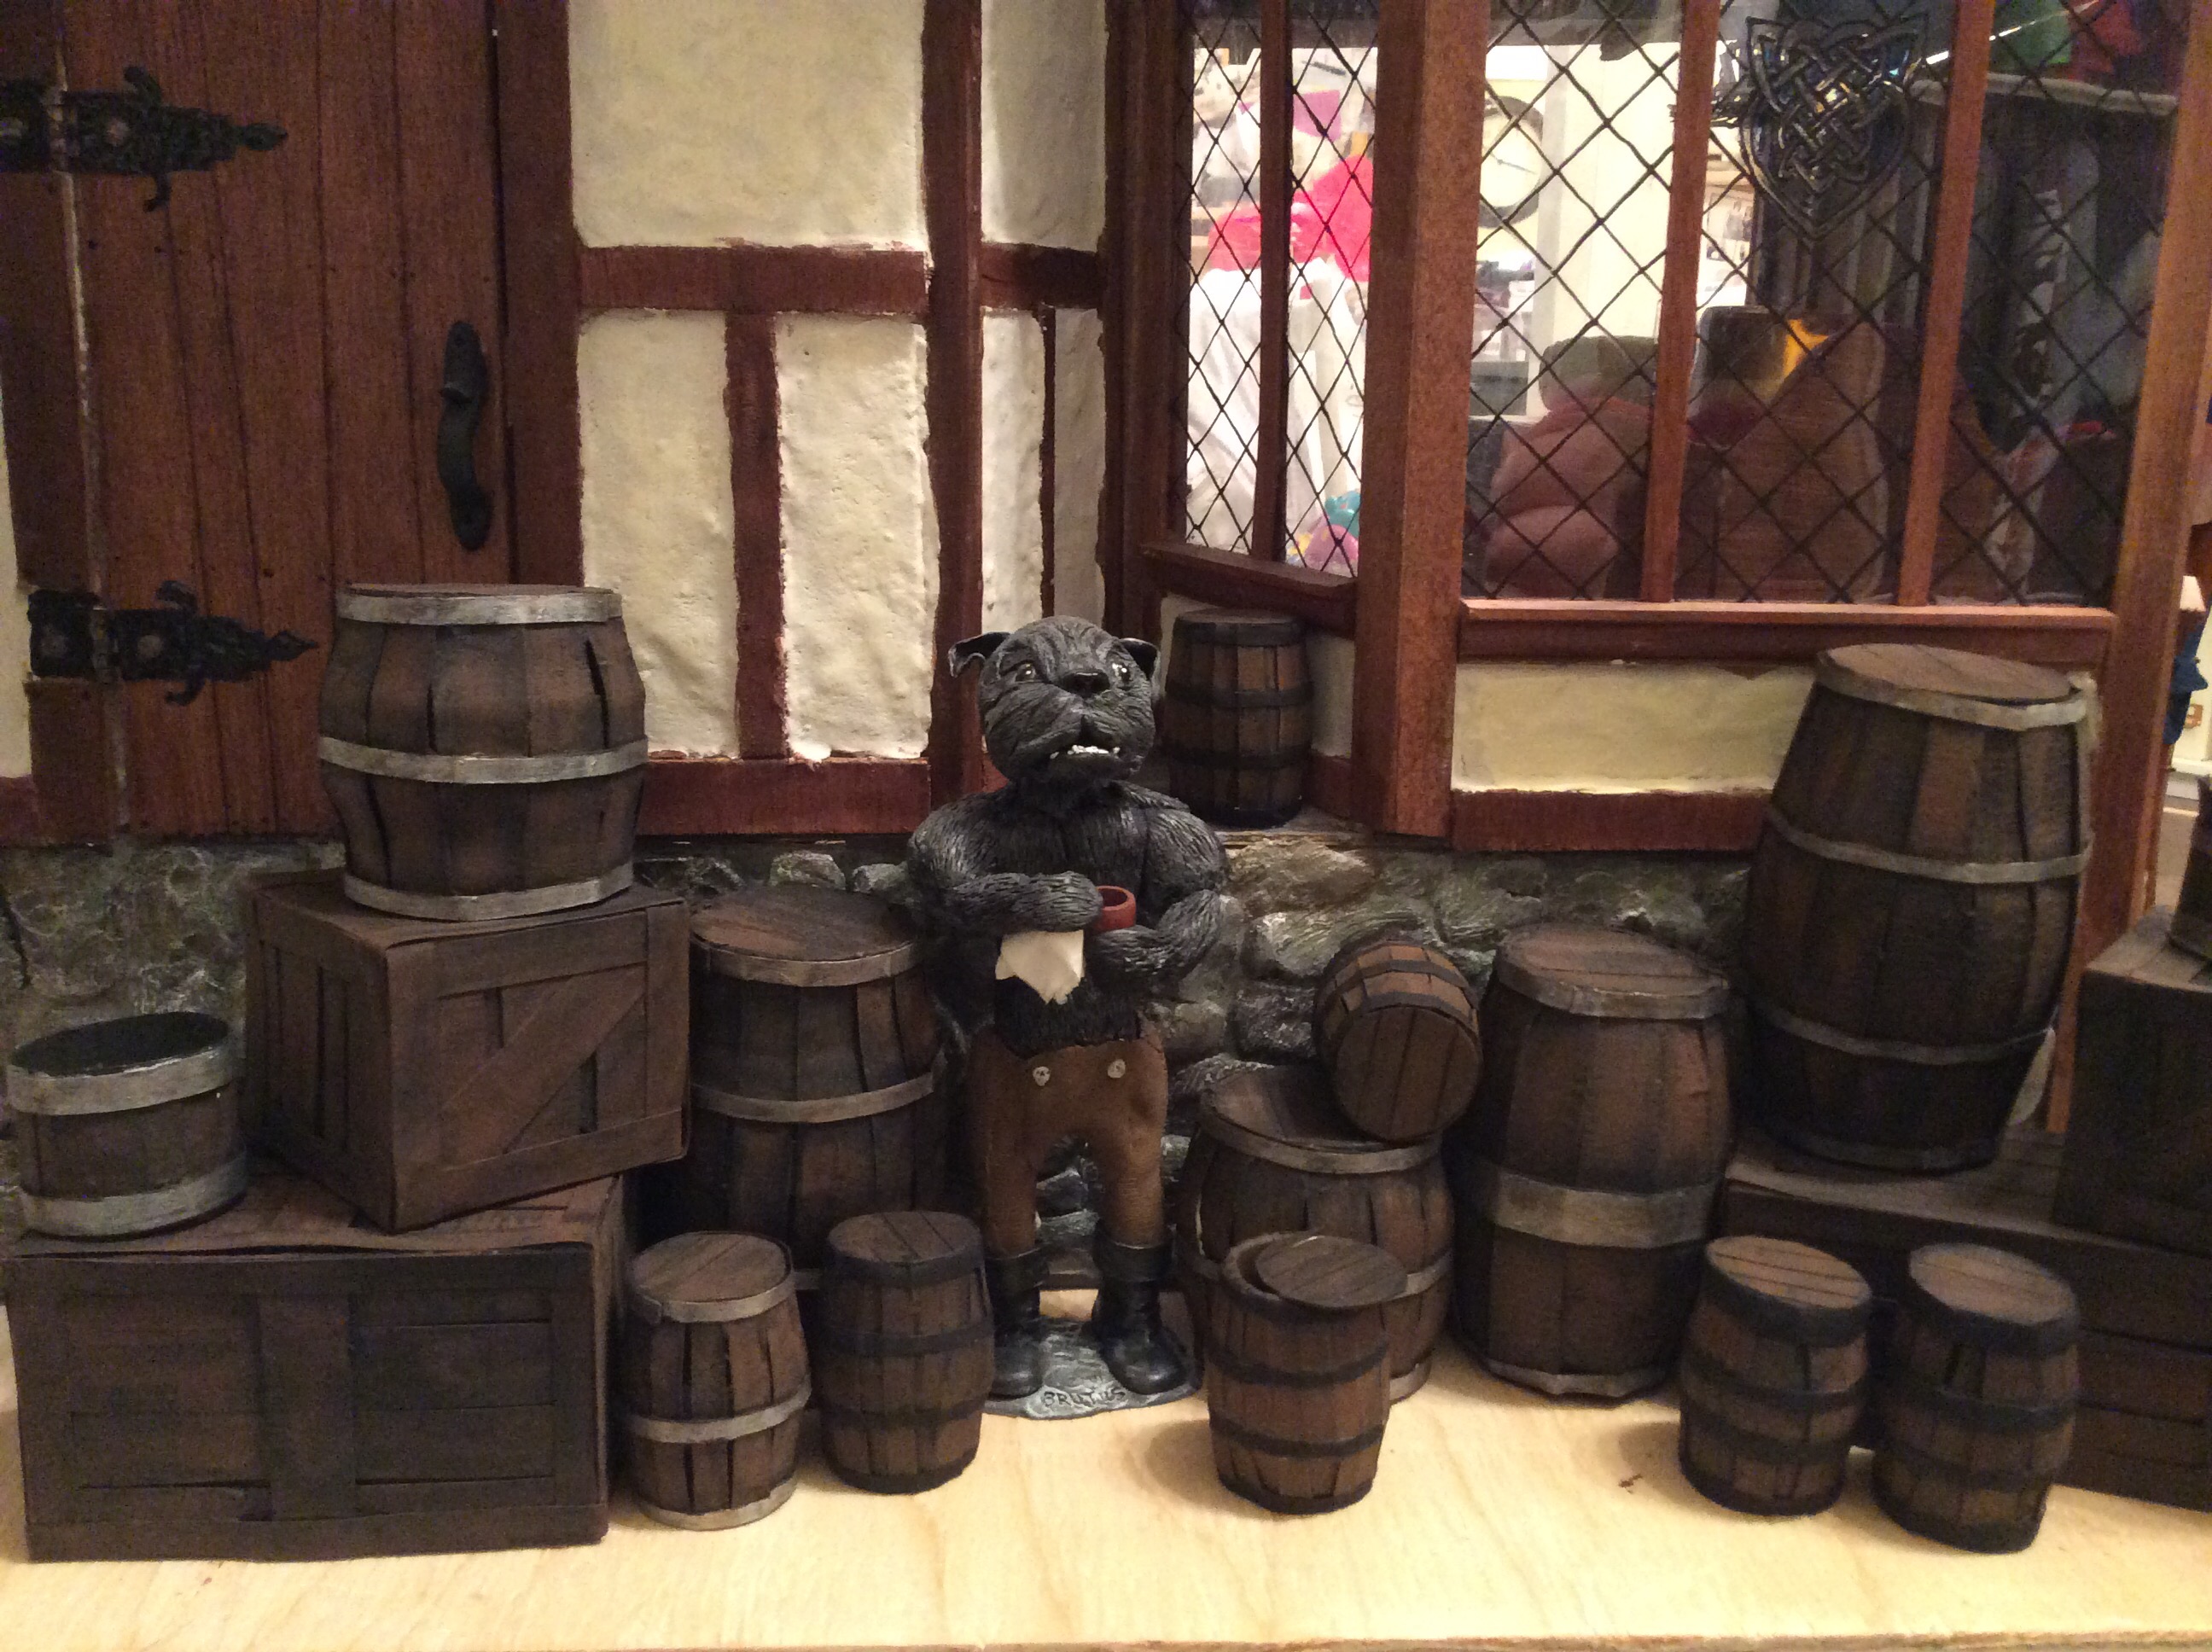
 Anyway, I wanted to share my progress with the crate and barrels. Front and center is my bartender, Brutus, there for scale, interest, and because he likes having his picture taken. 😉 They were easy, fun, and, my favorite: cheap! I used up recycled cardboard as well as old business cards I had around. My five year old daughter helped make a few barrels and crates, and they look terrific because of their imperfections, which fit the aged / beat up look I want. (Just a note that child labor in the craft room can be a total success!!) 😉
The tutorial I based this is on is a great one, over at Grim’s Dungeon. https://thegrinningskull.wordpress.com/2015/10/25/grims-dungeons-of-doom-scraping-the-barrel-making-mini-barrels/
Now, because I’m working in 1/12 scale, many of my barrels are bigger than his. For the largest barrels I found it actually worked better to use cardboard rather than card (I used recycled cereal boxes.) The heavier material (and my impatience) also meant I used the glued up for the larger barrels. The trick with the barrels is to only glue in the center and then pull them taunt to the edge. This way it hides the fact that there’s essentially empty space near the top (go check out the tutorial, and you’ll understand.)The crates were also easy. I was too lazy to use wood, since card and cardboard are so much easier to cut! I folded and cut up business cards and created a base, taping the heck out of them with masking tape. Then I covered each side in “planks” of more business card and cardboard.
The painting really sells the whole effect. I’m sharing here the “in progress” shot plus the finished project. You’ll see that many of my barrels were white, pink, yellow, and cardboard looking. After painting them all completely black (make sure it’s a fairly good coat, especially washing to make sure you get in all those books and crevices – you’ll still find lots you missed while taking pictures for your blog 😉 -trust me!). Next I used just cheap acrylic craft paint in burnt umber and cinnamon brown and painted them as lousy as I could over the black. Some of it was dry brushing, other times, seriously, sloppy painting! The lines and streaks sell the idea of wood. The barrels bands then were painted either black, or with the silver bands, they were aged with black wash and brown dry brushing (same paint as on the barrels.) I also went over the barrels with a black wash, taking off some of it, dabbing here and there which helped the aged look and again, to make them look less cardboard, more wood.
So, what do you think??
Next up I’m learning to make mini netting. And painting more teapots. 😉
Think a for stopping by! And remember: what happens in the craft room, stays in the craft room. 😉


