Category Archives: miniature

Books, books, and more Mini Books

Standard

In an effort to not actually think, I’ve been busy making mini-books now. Between, hmm, Thursday and Saturday night? I’ve made 133 mini books (which is about 50 more than I thought I’d made…and also explains why I’m kind of tired of making mini-books.) Hubby said it looked like a very small library had exploded, which is kind of what happened…or more like the library isn’t technically built yet?

Anyway, my fingers are now also suitably blackened since I’ve “distressed” many of them, as pretty much all of these books are intended for the fantasy dollhouse. Because what self-respecting witch or wizard would be without a plethora of books? (And yes, I also know I should be about actually writing my real books, but not happening right now.)

Most of these are made with opening pages using cut-off spines from glued magazine spines (magazines are now no longer safe around me since I’ve discovered this method.) I thought it would be a nightmare to cut the narrow section off the magazine, but turned out not too bad. You just measure, then I just used my plain old metal ruler and an exacto-blade and you do a whole bunch of  cuts until it goes all the way through. Not that bad at all. Needless to say most of the insides of the books aren’t actually interesting…but I don’t especially mind. Most of them are just needed to fill the plethora of shelves I’ve also made. 

Covers are a combination of those I printed off the internet of actual books (which were more tedious and time-consuming to put together, but very pretty in the end.) Others are pieces of scrapbook paper, some painted cloth to resemble old leather, and one of my other favorite effects was using masking tape and painting it. It really does have a nice leathery texture. What do you think?

Just a few more books to make that need to dry to the next step (and by few I mean 5 of them…I really am quite tired of making books for now. Plus, I’ve used up all the suitable magazines.) 😉 But I did want to try making a few open books (that will be permanently open, displaying their spell or whatevers.)

That’s that then. Time to pack up the books until I’ve finished everything and can start making displays. Next I may move onto polymer clay. I need to try and make mini-bones for curiosities (as hubby has declared purchasing bones from owl pellets gross and a no-go, even if they are sterilized.) Also going to experiment with resin again to make some of the potion jars. That should be interesting. 

Thanks for stopping by. And remember: what happens in the craft room, stays in the craft room. Happy crafting! 🙂 

Fantasy Dollhouse Pt 6: Adding Life

Standard

I just realized yet again, I haven’t updated this blog with more current photos of progress on the fantasy dollhouse. In my defence, there was the usual insanity of the holiday season coupled with maybe overcommitting myself to volunteering, plus a complete revision of my latest book. You know, the usual. 😉 

Anyway, it took me so long to get the trees and “moss” added that my original intention to get photos became impossible (or at the very least, pretty darned uncomfortable) with the arrival of snow. So, yet again you have to up with pictures in my could-be-tidied-craft room. 

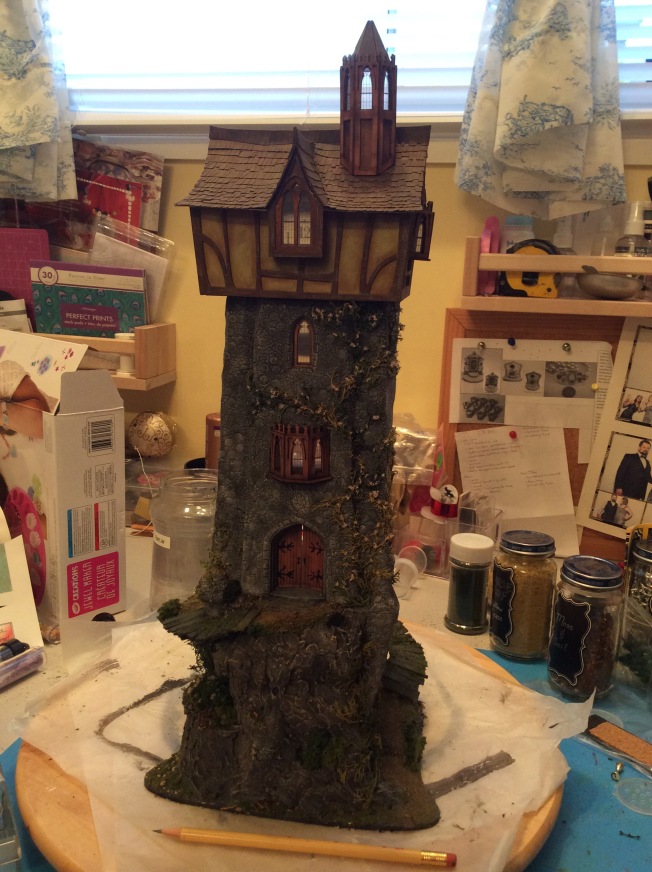
Onto the how: after I finished painting the egg carton shingles and aging the heck out of everything, it looked pretty dull to me. Plus, I’ve fallen in love with the look of moss covered roofs. I’m sure they’re terrible in real life, but this is fantasy, right? I started by splattering lime and greeny-yellow paint lightly over the roof to simulate lichen. I also decided that after all the trouble I’d taken to paint the roof tiles, I didn’t want to completely cover them in moss. From there I added glue and used “Green Grass Fine Turf” (the kind from railroad landscaping supply) and added it to places where moss tends to grow, particularly in gulleys, under the shingles, anywhere it can settle. I also added the occasional lichen since I read evidently, you can even get things like tomato plants growing in the shingles, and that sounded fun. 

Adding the green helped, but I also needed the trees. My original thought on these was that I wanted the trees to actually form the four corners of the building. But, since I like the faux-beams I have, instead I blended the trees into the wood. These are made of a wire armature covered in paper. The final bark, to give it a somewhat smooth maple-like mark was tissue and glue, built up to form the roots. Eventually I’d like to finish the garden in front of the house (it’s about the only place I have room for a garden). But for now, it’s a start. The maple leaves were cut out using a leaf punch out of simple printer paper I painted on both sides with shades ranging from pale green to browns, yellows, and oranges. I decided that this garden is going to simulate the very early autumn season, so not everything has changed colours yet (including the rose bush.) I glued lichen to the ends of each branches to simulate finer branches, and from there added each leaf one by one with tweezers (yes, really.) 

The climbing rose was a new adventure. I’ve never built a vine like this, but chose to build this one similarly to the trees. Which meant starting with a wire armature and building it into “branches” that all connect to a base kind of trunk. I gave it texture by coating in texture paste, then painting deep brown / grey, and dry brushing with greys and greens. I had to use hot-glue to attach it to the tower, since it kept falling down otherwise, and I wasn’t able to achieve the kind of twining look I wanted (as if there really was more roughness to my “stone tower” for the vine to cling to. From there, I again added small pieces of lichen to act as smaller, new growth branches. The roses are all hand sculpted from polymer clay shaded with chalk pastels before baking. Leaves were cut out of printer paper again painted on both sides, but this time in shades of yellows and greens (since I didn’t want it to be too late of autumn.) 

I’m particularly pleased with the climbing rose, since I feel it definitely adds that fantasy element and softens some of the harshness the house can have to set the tone for the right kind of fantasy (ie: not super dark and creepy.) I’ll either move onto the interior next or the garden, but the other houses are definitely feeling (and looking!) neglected, so they may crop up soon. 

What do you think? Any suggestions for what I plant in my magical garden? 

Thanks as always for stopping by. And remember: what happens in the craft room, stays in the craft room. Happy crafting!

Fantasy Dollhouse Pt5

Standard

Sorry, I know, there haven’t been many posts lately. Partially because the steps I was working on weren’t all that interesting to show the stages (unless you like looking at painted egg cartons.) 😉 I’ve also been busy since my first paranormal romance book releases this week which is, well, exciting and stressful. 

Finally, though, I have something worth showing you: the basic structure of the house is complete! Last night I finished adding some washes to age and gunk it up. So, it is looking a bit dark and gloomy, no doubt about it. But, that also means it’s almost ready to bring some life to it. I’ll be adding “moss” to the roof, plus two trees on the front section, along with vines and some landscaping that I think will really liven things up. 

The faux-slate shingles are made of egg carton following directions I found over at Treefeathers. Well, mostly following the directions. I confess I didn’t pain the sides and backs of them before I glued them on. I ended up instead covering those lighter edges with my dark wash. I also attached them in two different ways. I started using paper mache, since that worked really well for attaching the bricks and stones to the walls. It didn’t work as well for the shingles, since they weren’t flat and there was an overlap. I ended up switching to the glue-gun, which was fast and easy…fast and easy still meaning it took a couple of sessions to finish gluing them all on. 

The tower roof also still needs a finial on the top, which I’m going to make out of half of a plaster easter egg (we seem to have a lot of those around here.) 😉 I also want to make a weather vane and attach it all in one go, which is why for now, the very top of the tower roof isn’t quite finished off. 

I’ve made the two trees for the front, or at least, their rough forms which are currently under-painted black (I haven’t had a chance to begin any of the dry-brushing. I think I’m going to set the exterior to be very late summer / early autumn to allow for some yellowed leaves in the trees, just for some variety in colour, and because I didn’t want them all bare and skeletal. My intention for the house has never been to have it all dark and gloomy, but more of a fantasy-type witch house, not scary. Harry Potter-level witch / wizard, if that makes sense. 

Okay, I think that’s about all I have to say this time. I hope your projects have been going well. Any questions or comments? As always, thanks for stopping by and reading. And remember: what happens in the craft room, stays in the craft room. Happy crafting!

Fantasy Dollhouse pt4

Standard

Have you ever reached that point in a project when you’re starting to wonder when it will EVER be done?? That’s about where I’m headed on the fantasy dollhouse. I mean, I’m relatively happy with how it’s turning out, but I’ve been working on it for what seems like forever (in reality, something like around two and a half months, I think.)

Anyway, enough whining. This week I tackled the roof, something I’ve been dreading basically since deciding to build the darned thing. While walls aren’t quite as difficult (generally straight lines), the roof requires angles and pitches, and a lot of things that are likely far beyond me. Now, I already had the general angle of the roof from the gable ends (all required height to still fit beneath that shelf.) The catches were plenty: 

  1. a LOT of different gables / angles;
  2. Creation of the eyelash window (think that’s what it’s called);
  3. The tower roof, which was a whole other issue, because I also decided I want this removable…mostly because I don’t think I’ll be able to open the back access door for the top floor of the tower without otherwise creating an extremely complicated roof, and from what you can see, I’d already basically done that for the main house. 😉 
  4. the expanse of the roof, which nixxed my idea to use a kind of wood planks all the way across (I had nothing long enough);  
  5. The chimney / fireplace on the second floor which also houses the battery pack for the lights – and therefore needs to be removable (nothing like making my life easier, right?) 😉 
  6. The low clearance height of the second floor, which means I wanted the front portion of the roof to open for better access. 
I know I want to go with a faux-slate roof using egg cartons (the slates being something I haven’t begun to manufacture yet either.) So taking all this into consideration, I went with a black foam-core for the main structure. At least it was still light, but ironically, after using the material for most of the rest of the house, it wasn’t my first choice in this situation. Oh, well. It was what I had, and it works, which is basically how most materials were decided. 😉 Seriously though, it was also still lightweight while relatively strong (it could handle the expanse with the support of a very small central square dowel that runs the length of the house from the two main gable ends.) The main roof was a bit fiddly, especially fitting in and around the tower itself, and while I did try measuring and figuring out the angles…some of it I ended up just snipping and clipping until it fit, and plan to get a tighter fit once it’s secured and I’m moving onto the actual “slate” roofing material. 
 
The eyelash window was the next issue. I created this starting with a bamboo skewer, which could run the length from the central dowel beam out to the end of the window. That at least would establish the general height of the little window’s dormer-style roof. From there, I used a mix of thin cardboard (like cereal box weight) and construction paper to run lengths and widths, alternating which direction they went to weave a little dome-shape over the window and tie it into the main roof. I then covered this in small pieces of a tissue-paper / wood glue mache, and once it was dry it’s surprisingly rigid despite being very thin and light. 
 
The tower roof. Ah, the tower roof. So, this one I tried to be all technical and use perfectly measured and angled pieces customized for each and every wall section of the octagon…which was great until I went to assemble it, and it didn’t sit how I wanted. At which point I trimmed down all the pieces, and pieced them together using the glue gun. It is still quite custom – the front piece always has to line up with the front wall section (the one with the window in it.) 
 
After that, I’ve coated pretty much everything in the tissue-paper / wood glue mache mix to cover the edges of the foam core, add some ridgity (hopefully), and otherwise smooth out the shapes to prep it for the next steps. The undersides I’ve used the same treatement, only applying the tissue especially roughly to give the illusion of render / plaster. Once everything is nice and dry, it’s time to paint both sides (the top will remain black / dark grey as a base for the slate.) I also need to attach the thick piece of fabric ribbon to the two main roof sections to create a hinge, and paint it to camoflauge. After that, it’s time to install the permanently adhered pieces of roof (the front section of roof that goes over the eyelash window), get my faux slate all painted and ready, then finish the roof off. Because of how well using a paper-mache mix worked when I applied the egg carton bricks / render to the walls, I want to use it again for the roof. I found it did a nicer job than glue because the mache mix soaked into the egg carton making it harder, plus creating a stronger bond with very little effort (ie: none of that standing there holding it until it stuck in the position I wanted it.) 
 
So, what do you think?? Any suggestions? 
 
Thanks for stopping by, and remember: what happens in the craft room, stays in the craft room. Happy crafting!

Fantasy Dollhouse Project Pt3

Standard

So I’ve been working some more on the dollhouse whenever I have a chance. Although I’m not posting pictures of how far I’ve come, this weekend I’m supposed to pretend I have any clue what I’m doing and give the structure a roof. Under normal circumstances, this isn’t my strong suit. And this particular roof is a complicated best. Will post whenever it’s finally done. 🙂 

But I have accomplished finishing some other projects that I’m quite pleased with. The staircase and the second floor fireplace. 

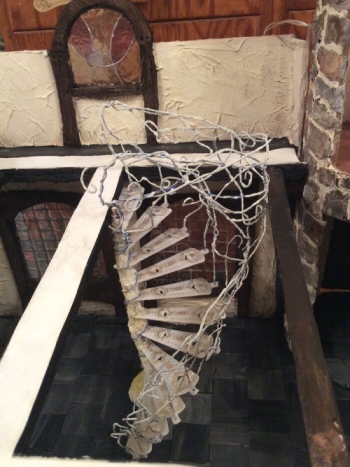
I’ve posted two pictures of the staircase – unpainted, and painted. You know, this was one of those projects that actually turned out much better than expected. It’s contructed of various guages of wire, paper, facial tissue, a cheap plastic fan, and a dowel in the center. I then coated the wire lightly with texture paste before painting to give it a rougher “bark” texture, as my original idea was that the staircase was “growing” out of a tree. Once painted, it got a few touches of “moss” (green landscaping flocking) along with some flowersoft flowers. I took lots of photos, because actually, once in the house, it’s not super visible. But at least I know I could make another now!

Next up was the fireplace. Another challenge, as I wanted to conceal the battery back that powers the string of LED lights somewhere, and thought the chimney was a good solution. But because of the low height of the chimney (the entire house has to fit beneath that shelf, remember?), it meant I didn’t have a lot of room. My solution is a fireplace / chimney combo that slides over the battery compartment (which is velcroed to the inside of the chimney wall) and can be removed if / when I need to change the batteries. Fortunately, I can reach up into the fireplace to turn on the lights, which means I won’t have to keep taking it off (which is GREAT, since it’s a bit finicky getting it back on – you need to line up with the back wall, plus then fit overtop of the fitted LED that pokes through the fireplace hearthstone. 

The next photo shows the fireplace looking a lot less pink. 😉 I used cheap airdry clay from the DollarTree, and as a consequence, my color choices were pretty limited, and hot pink it was. I’m posting a picture a bit early, as I haven’t finished dirtying up the fireplace, nor have I created the “fire” for inside, but that’s up next. 🙂 

So, what do you think? 

As always, thanks for stopping by and visiting. And remember: what happens in the craft room, stays in the craft room!

New project: Fantasy 1/12 Dollhouse

Standard

This is my newest project, one I’ve been collecting pieces for, but which hasn’t quite come to fruition until now (and believe me, it’s still a long way until “done” even now.) 
I decided I wanted to make a fantasy-type structure, with some basis in the Tudor / medieval period, and part in the fantasy realm (ie: I could break rules and have some fun if I wanted.) 😉 

I also had this piece of soni-tube that I wanted to turn into a tower for a really long time, so I decided that my design would be based on the “original wizard’s tower” that has now been expanded into a house and home for the wizard, his wife, and their Magic Emporium (yes, it looks like it needs capitalization, don’t you think?)

The second requirement was that there is only a very specific location it could fit into, which limited my height of the house-proper, as well as the size of the base. The tower, on the other hand, can be considerably taller since it can rise up beside the shelf that the other roof has to fit beneath. 

And the last requirement was that it had to be cheap and relatively easy for me to do, instead of waiting on my husband all the time. I love miniatures, but they can add up, and I’m not a huge fan of powertools and cutting pieces of wood. I decided that I wanted the flexibility of using materials like cardboard, foamcore, and papermache that would allow me to not only keep the structure light, but make it easier to create, plus allow me to add some of the organic structures I was thinking of (my original idea was that the house had been “grown” by four trees forming the four corners…I’ve since abandoned the notion as too complicated, though a few trees will definitely still be included. 

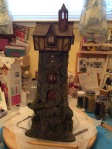
So, now to the pictures. On the left is the tower, or the first two floors of it and the front door. The top is a octagon-ish structure meant to look like half-timbering (not pictured.) This is before I used egg-carton to create the stone. Beside is the front door, which is also looking rather sad and forlorn, and very obviously cardboard (I’m hoping that in later photos it doesn’t look quite so obvious!)

To the right is the photo of one of the main wall sections of the house structure. There are five wall segments and they’ve been hinged together to allow me to completely close up the house, but also access it when I want. Originally, this section was supposed to be solid on the front (which you’re facing) and open on the right. But, that’s since changed and now it’s only the back that will open. I didn’t bother to include the photo of the other walls because frankly, at this point, they don’t look that exciting. 

What you see is the basic foamcore structure. On top of that I’ve stripped the foam and scored it with a wire brush to make it look like rough wood timber (in later pictures, you’ll see it actually looks pretty good – which you can’t see here.) Then between the timbers are egg carton “bricks” since this is meant to look like distressed / crumbling render, and the paper mache both gives the building a bit more structure, plus provides the texture of rough render. I might be one of the few people who still happened to have a phone book around, and now I’ve saved them since it’s lovely thin paper, perfect for paper mache, and easy to tear into pieces. 

By the way, I used a very simple mixture for my paper mache, and it worked out great. Just flour and warm water mixed until you get a creamy mixture, kind of very thick soup, but still smooth. And trust me on the warm water – it makes it so much nicer when your hands (and probably everything else too – do you see the edge of my table there?)

That’s all I have to share this week. So, what do you think? 

I know, not a lot to look at right now, but it gets better. I’ve forgotten to take photos of a few steps, so the next ones you’ll see will look amazingly colorized. Plus, the walls are actually standing, which makes it look a lot more, well, house-like. 😉 

Thanks for stopping by the read. And remember: what happens in the craft room, stays in the craft room. Have a great week, and happy crafting!

Not Dead…Still Busy. Here’s the Watch Tower!

Standard
Not Dead…Still Busy. Here’s the Watch Tower!

I probably have a whole category now dedicated to me telling you I’m not dead, nor have I fallen off the edge of the Earth. 😉 So, WordPress says it’s been 3 months since I last posted, and frankly, I’m surprised it’s not longer. The end of last year and the beginning of this one have been a bit challenging. Still, I have been finding time to create. 

Since I just finished it (the exterior and main carcass at any rate, all the decorations / details still need thought), I thought I’d share my latest project. 


Again, this is quarter scale, and another kit from Petite Properties, this time one of their newest kits, The Watch Tower, which I was lucky enough to receive as a Christmas gift. Despite the small scale, this sucker is still huge! Complete, it stands just over 19″ in height (which of course means it doesn’t fit in the cabinet I’d hoped it would live in. I’ve even imagined a story for this one. It was once created and owned by an evil enchantress. But…well, we all know what happens to horrible bullies, right? (At least in fairy tales.) She bit the dust, and now it’s been purchased by a couple who’ve turned it into a B&B. Yeah, access is kind of a pain (my husband swears this is not only the type of place we’d choose to stay at, he’s pretty sure we’ve been there and somehow made it up those trecherous walkways.) But who can beat the views? Plus, omelettes and fresh croissants every morning. 😉 

Anyway, I’m really pleased with how this turned out. The little walkways that jut out are made of matchsticks and pieces of coffee-stirrer sticks. I had painted them first with a dull gray for age, but found it a bit light. So after they were glued in place I used a darker blackish wash and while it was wet, sprinkled on scenery fine green turf. I rubbed it with my finger whilst wet, and it created a fantastic effect where it stayed just in the cracks and edges where I wanted it. Plus, the turf had picked up some of the dark paint, so presto! I had color graduation too (total happy accident, but I’ll take credit for it.) 😉  There are also lights in this one, using an inexpensive strand of Christmas-type battery lights that are threaded up the stairwell (the kit was pre-drilled for just such an application.) 

I’ll post more on some of the Christmas gifts I obviously couldn’t post about during the holiday season. Otherwise, thanks for stopping by, happy creating, and remember: what happens in the craft room, stays in the craft room. 

Beer Bottle Cap Miniature Plates

Standard

Hey there! I know, I know, I fell off the edge of the world again. But I’ve brought back something fun today. 🙂 

Ever since I saw how to squish beer bottle caps with a tortilla press online, I’ve wanted a tortilla press. I finally got one, and tonight I had a huge amount of fun squishing all the caps I’d saved. 😉 


Let me go back a bit…For my pirate tavern, I had the idea of using interesting beer bottle caps as “plates” along the plate rail in the main tavern. But when it came to flattening the beer bottle caps, my uninitiated attempts using pliers or a hammer were unsuccessful. Then, even after I ordered the tortilla press, I wondered how hard I would be to remove the liners from the caps (which is usually required to get them to squish nicely.) 

When I found a few of the liners hard to remove, in my impatience, I put one into the tortilla press (just do one at a time), and to my delight, it curled back the edges and looks just like a miniature platter in 1/12 scale to me! If you look in the picture, you’ll see that there’s one bright plain silver one (four over from the right, one up.)  That one is squished “properly” and is generally the look most people want. 

I, however, prefer the “plate” look, especially for what I needed! It also seemed to make a difference whether you placed the cap in face down or face up. To get the “plate” look, I placed the beer bottle cap decorative side down or spiky side up (still with the liner in place – look how easy!). Sometimes when I pressed it, a few edges weren’t completely tucked down, but it was quick work with a needle nose plier. 

Now I just want more interesting caps. My hubby is pleased – just not sure he realizes he now needs to choose his beverage based on how interesting the cap is. 😉 

Have you ever pressed beer bottle caps? What did you use them for? Any chance they were in miniatures? 

Thanks for stopping by! And remember: what happens in the craft room, stays in the craft room. Happy crafting!

Mini Crates & Barrels

Standard
Mini Crates & Barrels

I know, I vanished again. I have been busy…I just keep forgetting to share! I’m at least two teapots behind (yep, I’ve painted four now this year – shh! Don’t tell my husband, LOL!)

But I’ve also been busy crafting lots of different things. Since my hubby finally made me a beautiful cabinet for two of my dollhouses (yep, need to share about those too), it’s inspired me to get back to finishing the houses I started renovating…and never quite finished. My pirate tavern has been calling especially loudly. So, I’ve been working on making some barrels and crates to help fill out the scene (they’re going to have a place on the front dock, aka project 79838261) and  there will be another mini scene below the tavern (project 78838262)  ðŸ˜‰

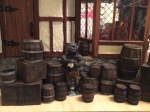
Anyway, I wanted to share my progress with the crate and barrels. Front and center is my bartender, Brutus, there for scale, interest, and because he likes having his picture taken. 😉 They were easy, fun, and, my favorite: cheap! I used up recycled cardboard as well as old business cards I had around. My five year old daughter helped make a few barrels and crates, and they look terrific because of their imperfections, which fit the aged / beat up look I want. (Just a note that child labor in the craft room can be a total success!!) 😉

The tutorial I based this is on is a great one, over at Grim’s Dungeon. https://thegrinningskull.wordpress.com/2015/10/25/grims-dungeons-of-doom-scraping-the-barrel-making-mini-barrels/

Now, because I’m working in 1/12 scale, many of my barrels are bigger than his. For the largest barrels I found it actually worked better to use cardboard rather than card (I used recycled cereal boxes.) The heavier material (and my impatience) also meant I used the glued up for the larger barrels. The trick with the barrels is to only glue in the center and then pull them taunt to the edge. This way it hides the fact that there’s essentially empty space near the top (go check out the tutorial, and you’ll understand.)The crates were also easy. I was too lazy to use wood, since card and cardboard are so much easier to cut! I folded and cut up business cards and created a base, taping the heck out of them with masking tape. Then I covered each side in “planks” of more business card and cardboard. 

The painting really sells the whole effect. I’m sharing here the “in progress” shot plus the finished project. You’ll see that many of my barrels were white, pink, yellow, and cardboard looking. After painting them all completely black (make sure it’s a fairly good coat, especially washing to make sure you get in all those books and crevices – you’ll still find lots you missed while taking pictures for your blog 😉 -trust me!). Next I used just cheap acrylic craft paint in burnt umber and cinnamon brown and painted them as lousy as I could over the black. Some of it was dry brushing, other times, seriously, sloppy painting! The lines and streaks sell the idea of wood. The barrels bands then were painted either black, or with the silver bands, they were aged with black wash and brown dry brushing (same paint as on the barrels.)  I also went over the barrels with a black wash, taking off some of it, dabbing here and there which helped the aged look and again, to make them look less cardboard, more wood.

So, what do you think?? 

Next up I’m learning to make mini netting. And painting more teapots. 😉

Think a for stopping by! And remember: what happens in the craft room, stays in the craft room. 😉

No. 1 Gnome Place: First Fairy House

Standard

So…I’m gambling that my mom won’t have time to be checking social media and accidentally see this post before tomorrow. Because my first attempt at a fairy house is also part of her Mothers’ Day present. 🙂 


 I’m quite pleased with No. 1 Gnome Place for a few reasons: 

  1. It was fairly quick and easy. 
  2. It was extremely cost effective – especially considering the outrageous cost of similar fairy houses in-store. 
  3. It used supplies I had on hand, and which aren’t hard for anyone to get. 
  4. It was an example of me actually making one of the endless DIY craft projects I like to pin when I fall down a Pintrest rabbit-hole (and if you’ve been on Pintrest, you totally know what I mean, LOL!)

So let’s go over the points. 

1. Fairly quick and easy. 

Okay, so full disclosure is that this might not be quite as quick and easy if you don’t have experience sculpting. I used polymer clay, and started with a neutral flesh tone for the overall house, that’s sculpted overtop of a simple mason jar. Once I had the mason jar covered, I made the door and cut holes for windows, and then pressed a “cobblestone” texture sheet all over it. It would have been MUCH easier to use the texture sheet before doing any other details, but as usual, I didn’t figure this out until later. 😉 I shaded it with soft pastels before baking and hardening, and then painting with acrylics. The mushroom “roof” was made over a wire-sheet and aluminum foil armature (which is a fancy way of saying I squished up some metal into a vaguely mushroom-type shape, and covered with clay.) The entire process from initial supplie gathering and sculpt all the way to finished paint took 3-4 days, max.

2. Extremely cost effective.

I do have a stocked craft room, and used polymer clay and a jar I had on hand. If you were to buy polymer clay blocks, I used two full ones for the roof, and maybe one to two for the overall body of the house. Which would probably run you about $12,  which is a heck of a lot better than the $30 plus you usually see the houses priced at! No, this isn’t ceramic, and polymer clay will eventually lose its color in the sun…but it is still a kind of plastic, and should stand up fairly well if it’s kept safe from extreme weather.

3. Used simple supplies. 

As suggested, this required approximately: 4 blocks of polymer clay; a small / medium mason jar used in canning (or even a jam jar you had around); aluminum foil; sculpting mesh (though this is optional – you could get away with just using more aluminum foil); acrylic paints; battery operated tea-light (also optional, but if you’ve cut holes for “windows” as I did, you can put in the little candle and presto! It’s lit for night.) 

4. I actually used one of the ideas I saw on Pintrest. 

I wanted to share my original pin..but I can’t find it any more. 😦 So, if you’re curious, search “fairy house, mason jar” and something should pop. Sorry about that. 

I’m rather thinking I’d like to add to the collection; perhaps with a baby food jar I’ll make a smaller house, and I’m thinking my mom really needs more of a village than just a single house. 😉 

So, what do you think? Are you into the fairy house craze?

Thanks for stopping by, and wishing you all happy crafting and a very happy Mothers’ Day. Oh, and remember: what happens in the craft room, stays in the craft room. 😉